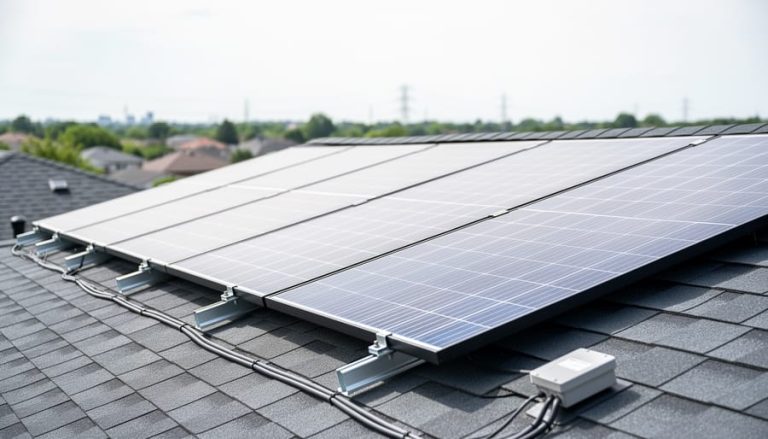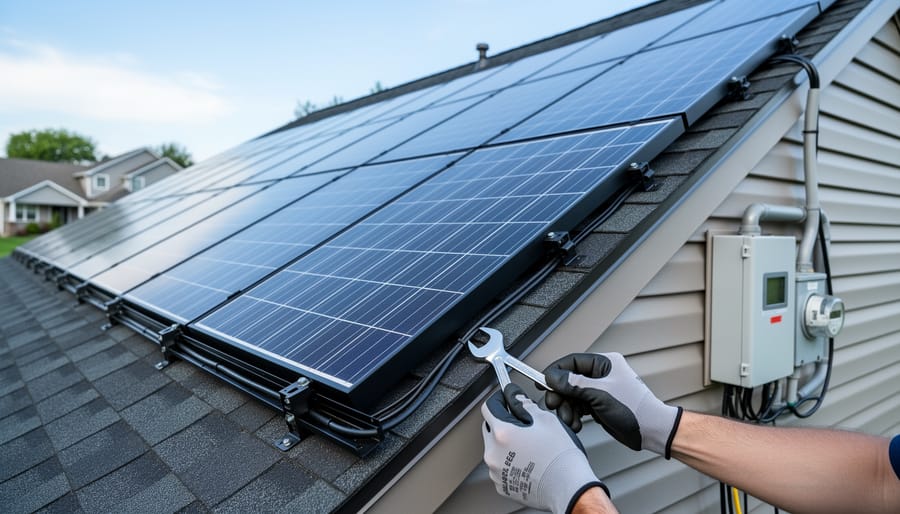
Installing a residential solar energy system on your rooftop typically takes one to three days once equipment arrives, but the complete journey from decision to grid connection spans two to four months when you account for planning, permits, and inspections. The process involves selecting qualified solar installers, designing a system sized to your household’s energy needs, obtaining local permits, professionally mounting and wiring panels to your roof and electrical panel, passing government safety inspections, and finally connecting to the utility grid under net metering agreements that credit you for excess power generated.
The benefits extend beyond personal savings. As more neighbors learning solar make the switch, entire communities build resilience against rising energy costs while reducing their collective carbon footprint. Solar community projects have shown that residential installations create momentum for broader clean energy adoption, influencing local policies and making sustainable power more accessible.
Net metering programs allow you to receive ongoing bill credits for electricity your system exports to the grid, turning your home into a small power station. While federal incentives that provided a 30% tax credit for installations completed through December 31, 2025, have since expired, many state and local programs continue to make solar financially attractive. Permitting and inspection requirements protect your investment by ensuring installations meet safety codes, and though they add time to the timeline, they’re essential steps before your system can legally produce electricity on the grid. Understanding each phase helps you move confidently from consultation to that first sunny day when your meter runs backward.
What You’ll Need Before Installation Begins
Before your residential solar energy system transforms your roof into a clean energy generator, you’ll need to assemble the right equipment and professional team. Understanding what goes into a successful installation helps you evaluate proposals from installers and ensures nothing gets overlooked.
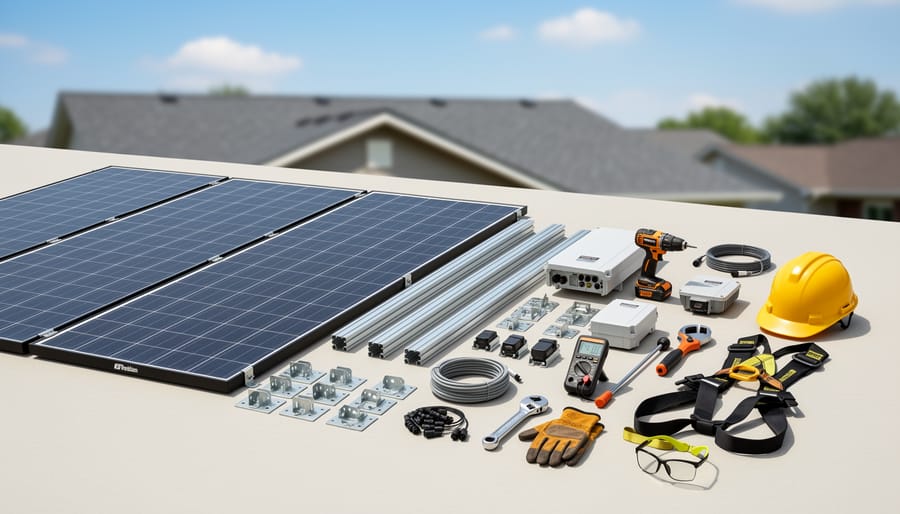
The physical components form the foundation of your system. Solar panels themselves are the most visible element, converting sunlight into direct current electricity. These panels connect to mounting hardware specifically engineered for your roof type, whether you have asphalt shingles, tile, or metal roofing. An inverter serves as the system’s brain, converting the DC power from panels into the alternating current your home uses. You’ll also need electrical components including wiring, conduit, junction boxes, and a disconnect switch that allows the system to be safely shut down when needed.
Essential equipment and materials include:
- Solar panels rated for residential use with appropriate wattage for your energy needs
- Roof mounting rails and brackets compatible with your roofing material
- Inverter system (either string inverters or microinverters depending on system design)
- Electrical wiring, conduit, and junction boxes rated for outdoor solar installations
- Disconnect switches and safety equipment meeting local electrical codes
- Monitoring equipment to track system performance after installation
Working with certified solar installers is not optional. These professionals bring expertise in structural engineering, electrical work, and local code compliance that protects both your investment and your safety. Qualified installers carry proper licensing, insurance, and certifications from organizations like the North American Board of Certified Energy Practitioners. They handle the complex calculations for system sizing, manage permit applications, coordinate inspections, and ensure your installation meets all requirements for utility interconnection and any available tax credits.
Your installer will specify exact equipment quantities and brands based on your roof’s characteristics and energy goals during the design phase.
Understanding Permits and Inspections
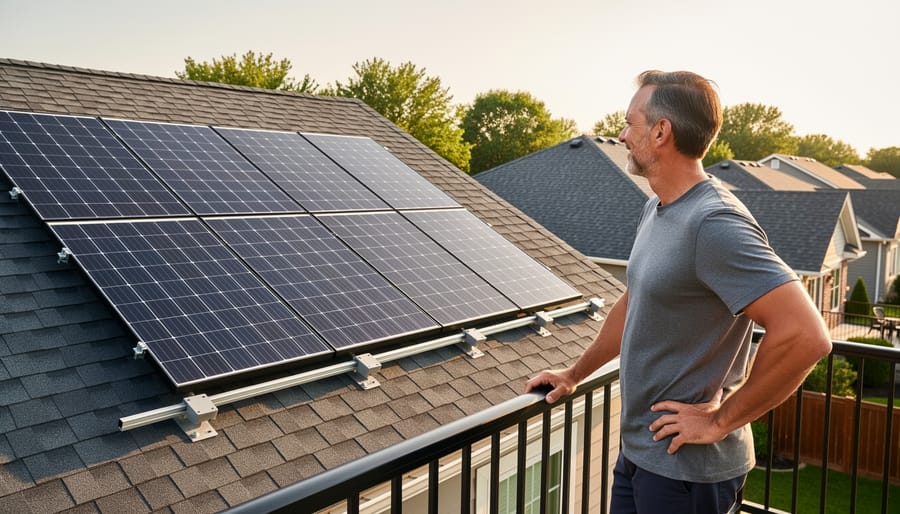
Local governments require permitting and inspection requirements for rooftop solar installations to ensure your system meets electrical codes, structural standards, and fire safety regulations. These safeguards protect not just your household but your entire neighborhood from potential hazards that could arise from improperly installed electrical systems. Think of permits as your community’s way of verifying that the clean energy transformation happening on your roof is done right.
The application process typically starts with your installer submitting detailed plans to your local building department. These plans show the system layout, electrical connections, mounting methods, and structural calculations proving your roof can safely support the array. Processing times vary by jurisdiction, but most permits are reviewed within a few weeks. Your installer handles this paperwork as part of their service, though you’ll need to sign the application as the property owner.
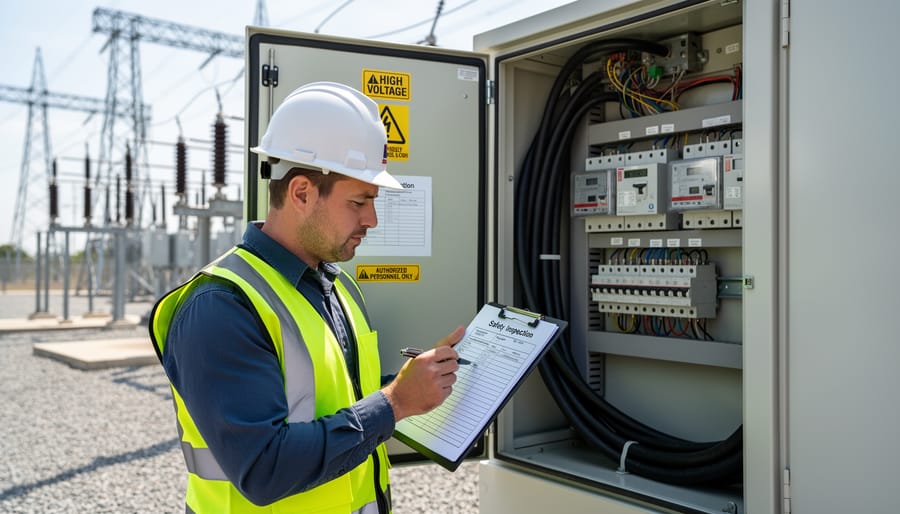
After your system is installed, a municipal inspector visits your home to verify the work meets approved specifications and current safety codes. They’ll check electrical connections, grounding systems, mounting integrity, and proper labeling. This final inspection is required before your utility company authorizes grid connection through net metering programs. The inspector’s approval means your system is safe, compliant, and ready to start generating clean energy for your community.
Most professional installers schedule and coordinate inspections on your behalf, walking you through what to expect at each stage. Their experience with local requirements streamlines the process considerably.
Safety Considerations and Stop Conditions
Installing solar panels involves serious hazards that require professional expertise. Rooftop work at heights poses fall risks, and electrical systems handling high-voltage DC current demand specialized training. Your roof must meet specific structural requirements to support the combined weight of panels, mounting hardware, and potential snow loads, typically adding 2.5 to 4 pounds per square foot. A structural engineer should evaluate older roofs or those with visible sagging, water damage, or compromised integrity before any installation proceeds.
Weather conditions dictate safe working windows. Installers must halt work during rain, high winds above 20 mph, lightning storms, or when roof surfaces become wet or icy. These conditions create slip hazards and compromise the weatherproofing process that protects your home from leaks.
Electrical safety requires shutting off power at specific stages and following strict protocols when connecting DC arrays to inverters and AC systems. Only licensed electricians should make final connections to your home’s electrical panel and utility meter. If your installation team suggests shortcuts around permit requirements, attempts work in unsafe weather, or lacks proper credentials and insurance documentation, stop the project immediately and contact a reputable solar contractor.
The Complete Installation Process
Site Assessment and System Design
Before installers set foot on your roof, they conduct a thorough site assessment that determines whether your home is a good candidate for solar and how much energy your system can produce. This evaluation begins with analyzing your roof’s orientation and angle, south-facing roofs in the Northern Hemisphere capture the most sunlight throughout the day, though east and west orientations can still work well. Professionals use specialized tools to measure your roof’s pitch and calculate how many peak sun hours your location receives annually.
Shading analysis comes next. Installers examine nearby trees, chimneys, and neighboring buildings that cast shadows across your roof during different seasons. Even partial shading on a single panel can reduce your entire array’s output, so they map shade patterns to identify the best panel placement. Many use drones or satellite imagery combined with software that simulates sun paths throughout the year.
Structural integrity matters just as much as sunlight exposure. Your roof must support the added weight of panels, mounting hardware, and potential snow loads. Installers check roof age, material condition, and underlying framing strength. If your roof needs replacement soon, they’ll recommend handling that work first, installing panels on a failing roof means removing and reinstalling them later at additional cost.
Finally, professionals review your electricity bills from the past year to understand your consumption patterns and size the system accordingly. They’ll design an array that matches your energy needs without oversizing, creating a custom layout that maximizes your roof’s solar potential while respecting its limitations.
Securing Permits and Approvals
With your system designed and your installation team selected, the next critical milestone is obtaining the required permits from your local government. This administrative step ensures your installation meets building codes, electrical standards, and safety requirements that protect both your home and the broader electrical grid.
Your solar installer typically handles the permit application process on your behalf, submitting detailed plans that show panel placement, electrical connections, and structural calculations to your city or county building department. The application includes engineering specifications demonstrating that your roof can support the added weight and that all electrical work complies with the National Electrical Code. Processing times vary by jurisdiction, some municipalities approve permits within days, while others may take several weeks depending on workload and review complexity.
Once the application is submitted, expect your local building department to review the plans for compliance with zoning regulations, setback requirements, and fire safety codes. Some areas have streamlined permitting for residential solar to encourage adoption, while others maintain more detailed review processes. Your installer should keep you informed about approval status and alert you to any plan revisions the permit office requests before issuing final authorization to proceed with installation.
Installing Mounting Hardware and Panels
With permits approved and your roof ready, installers begin securing the foundation that will hold your panels for decades. They start by locating roof rafters using electronic stud finders, ensuring mounting points anchor into the strongest structural members rather than just surface shingles. Each attachment point receives a waterproof flashing assembly, typically stainless steel or aluminum, that slides beneath shingles and creates a permanent seal against rain and snowmelt.
The mounting rails come next, bolted to these flashed anchor points in precise rows that match your system design. Installers use laser levels to guarantee the rails sit perfectly parallel, because even slight misalignment causes panels to fit poorly or creates stress points that compromise roof integrity over time. Many systems use rail-less designs now, which reduce weight and attachment points while maintaining structural strength.
Once the framework is secure, crews carefully lift panels onto the roof and lock them into the rails using specialized clamps. Each panel clicks into position with an audible snap, and installers verify that no gaps exist between units. They leave small expansion spaces to accommodate thermal movement as panels heat and cool through daily cycles. The entire mounting system is engineered to flex slightly with your roof during wind events while keeping panels firmly in place, protecting both the array and the structure beneath it.
Electrical Connections and Inverter Setup
Once your solar panels are securely mounted, the installation team begins the electrical work that brings your system to life. This phase connects individual panels into a functioning array and integrates that power into your home’s electrical system through an inverter.
Installers start by running wiring beneath the panels, connecting them in series or parallel configurations depending on your system design. These connections create a direct current (DC) circuit that channels electricity from the panels down to the inverter, typically mounted on an exterior wall or in your garage. The inverter serves as the heart of your system, converting DC electricity into alternating current (AC) that powers your appliances and lights.
Next comes integration with your home’s electrical panel. Technicians install a dedicated circuit breaker for the solar system, allowing AC power from the inverter to flow into your home’s existing wiring. They’ll also install a production meter that tracks how much electricity your panels generate. If you’re participating in a net metering program, a bidirectional utility meter replaces your old meter, measuring both the electricity you draw from the grid and the excess power you send back.
Throughout this process, installers follow strict electrical codes and grounding requirements to ensure safety. All connections are weatherproofed, conduit is properly secured, and the system includes automatic shutdown features that protect workers and your home during maintenance or emergencies.
Inspection and Utility Interconnection
After your installation team finishes connecting the panels and inverter, two critical approvals stand between you and flipping the switch: a local government inspection and utility company authorization.
A professional inspector from your municipality visits the site to verify every component meets electrical and building safety codes. They examine mounting integrity, wiring connections, grounding systems, and fire code compliance. This inspection protects you and your neighbors by confirming the installation won’t create electrical hazards or structural risks. Your installer schedules this visit and addresses any issues the inspector identifies before you can proceed.
Once you pass inspection, your installer submits interconnection paperwork to your utility company. This process authorizes your system to connect to the grid and establishes your participation in available net billing programs. These programs provide ongoing bill credits for excess electricity your panels generate and send back to the grid, making your investment more economical over time.
The utility reviews your application, verifies the inspection approval, and may install a bidirectional meter that tracks both electricity you consume and electricity you export. Approval timelines vary by provider, typically ranging from a few days to several weeks. Your installer handles most communication with the utility, but you’ll receive official documentation confirming your system is authorized to operate and export power.
Verifying Your System Works and Monitoring Performance
Once your installer completes the final connection, the moment arrives to confirm your residential solar energy system is actually producing clean energy. Your installer will power on the system and verify that electricity flows from the panels through the inverter to your home’s electrical panel. Within minutes, you should see the inverter display showing active power generation, typically measured in kilowatts, confirming the array is converting sunlight into usable electricity.
Most modern systems include monitoring software accessible through a smartphone app or web portal. This real-time dashboard shows how much energy your panels generate each hour, your current production rate, and cumulative output since installation. Check these readings during peak sunlight hours (usually 10 AM to 3 PM) to ensure production matches the projections from your installation cost estimate. If your system underperforms significantly compared to the installer’s predictions, contact them immediately, the issue might be as simple as a tripped breaker or misconfigured inverter setting.
Your utility bill provides another verification method. Net metering programs credit your account for excess electricity your system sends to the grid, so you should see these credits appear within one to two billing cycles after activation. Compare your new bill to pre-solar usage: if your system was sized to cover 80% of your needs, your charges should drop proportionally. Bills that don’t reflect reduced grid consumption suggest a connection issue worth investigating.
Track performance for the first month, noting any days with unexpectedly low output. Cloud cover naturally reduces generation, but persistent underperformance indicates a problem. Most installers offer a warranty period with included monitoring support, so use that window to establish baseline expectations and address any concerns while labor is still covered.
Financial Incentives and Tax Credits
Installing solar panels represents a substantial investment, but multiple financial programs reduce what you ultimately pay. Understanding these incentives helps you calculate the true cost of going solar and plan your budget effectively.
The federal Residential Clean Energy Credit covers 30% of your total installation costs for qualified clean energy property installed in your home. This credit applied through December 31, 2025, and covered expenses including panels, mounting equipment, inverters, wiring, and labor.
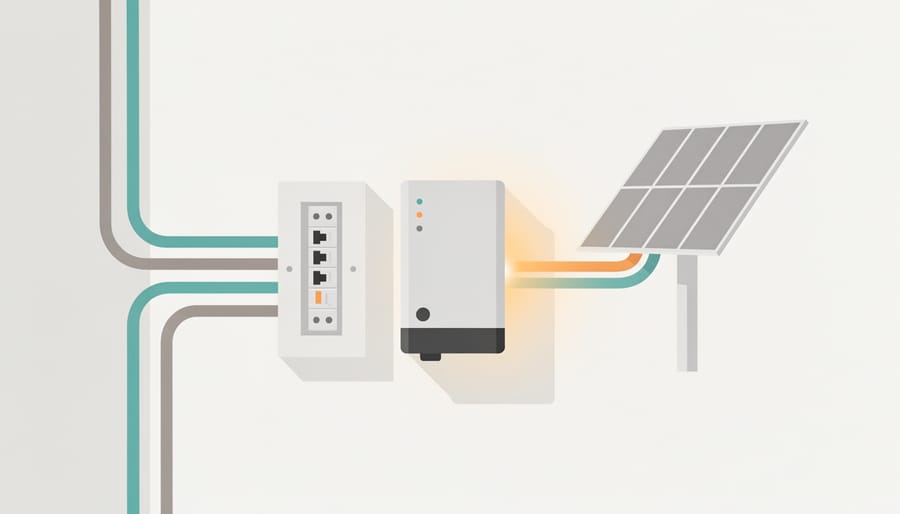
Beyond the upfront tax credit, net billing and Net Energy Metering programs provide ongoing financial benefits. These billing mechanisms credit your utility account for excess electricity your system generates and sends to the grid. When your panels produce more power than your home uses, typically during sunny midday hours, that surplus flows to your neighbors through the grid, and you receive credits that offset electricity you draw at night or during cloudy periods. The credits appear directly on your monthly utility bill, reducing what you owe.
The combination of initial tax incentives and ongoing bill credits substantially lowers the effective rooftop solar costs over your system’s lifetime. Net metering essentially turns your meter backward when you generate excess power, transforming your home into a small power plant that earns credit for contributing clean energy to your community. These programs vary by state and utility company, so check with your local provider about specific credit rates and program details available in your area.
Common Questions About Rooftop Solar Installation
Homeowners considering rooftop solar often have similar questions about what to expect during and after installation. Here are answers to the concerns we hear most frequently from people taking this step.
How long does the entire installation process take?
Most residential solar installations are completed in one to three days once permits are approved and equipment arrives. The permitting and approval process beforehand typically takes several weeks to a few months depending on your local government’s review timeline.
Will installing solar panels damage my roof?
Professional installers use mounting systems designed to protect your roof’s integrity, and they seal all penetration points to prevent leaks. A properly installed system shouldn’t cause damage, and many installers will assess your roof condition beforehand to ensure it can support the array for its 25-30 year lifespan.
What maintenance do solar panels require?
Residential solar energy systems require minimal maintenance since panels have no moving parts. Most homeowners only need to occasionally rinse off dust or debris, and monitoring systems alert you to any performance issues that might need professional attention.
What happens to my electricity bill after installation?
Your utility bill will reflect the electricity your system generates, and net billing programs provide credits for excess power you send back to the grid. Many homeowners see dramatic reductions in their monthly bills, though you’ll typically remain connected to the utility for times when your panels aren’t producing enough to meet your needs.
Beyond these basics, it’s normal to wonder about system performance during different seasons, what happens during power outages if you don’t have battery storage, and how solar affects your home’s resale value. Your installer should walk through these scenarios during the initial consultation, explaining how your specific system will perform based on your location, roof characteristics, and energy usage patterns. The key is choosing an experienced installer who takes time to answer your questions and set realistic expectations rather than rushing you through the decision.
Installing a residential solar energy system represents one of the most impactful decisions you can make for your home, your wallet, and your community. You’ve now seen the complete journey from initial assessment through final inspection, and you understand how each step brings you closer to clean, renewable energy generation on your own roof.
The benefits for homeowners extend far beyond reduced electricity bills. Every kilowatt-hour your system produces strengthens the local grid, reduces strain during peak demand, and demonstrates to neighbors that solar energy is accessible and practical. Net metering programs ensure you receive fair credit for the clean power you export, while federal incentives help offset your initial investment.
Take the next step by requesting quotes from certified installers in your area. The professionals who conduct your site assessment will provide personalized guidance based on your roof’s specific conditions and your household’s energy needs. The solar-powered future isn’t waiting somewhere down the road, it starts on rooftops like yours, one installation at a time.